ideas for reusing plastic bottles

ideas for reusing plastic bottles


7 Morning Stretches to Start Your Day

     Including some stretching in your daily morning routine can help energize you for the day. That could mean you can skip that coffee until midmorning, when you might need it more.  It can also help you go into the day with higher levels of confidence. This sequence can take less than 10 minutes, or longer if you want to stay in poses for a few breaths longer or repeat the whole sequence a few tim
It can really make a difference in how both your body and your mind start the day.

Child’s Pose

This restorative pose is great for gently stretching out your hips, pelvis, thighs, and spine, all of which can be a bit tight in the morning. It can feel really great if you’ve slept a little “wrong” or twisted up. It also calms the brain and relieves stress and fatigue, so it can be helpful for starting the day off on the right foot.
Equipment needed: For all these poses, a yoga mat is a good. If you don’t have a yoga mat, you should be on a carpet or stable rug (you won’t slip on the wood!) to cushion your knees.
Muscles worked: This lengthens your gluteus maximus, piriformis, other rotators, hamstrings, spinal extensors, and more.
child's pose
  1. Begin on all fours on the mat, with your knees directly under your hips but your big toes touching. You can widen your toes if having them touching puts any pressure on your knees.
  2. Inhale and feel your spine grow longer.
  3. As you exhale, take your butt back to your heels and tuck your chin to your chest.
  4. Rest here, with your forehead on the ground and your arms outstretched. You can also put your arms next to your body, palms resting up if you prefer.
  5. Hold this for 5 deep, even breaths.

Cat-Cow (Marjaryasana and Bitilasana)

These two poses done together can increase the circulation of your spinal fluid. This will help lubricate the spine, stretch your back and torso, and gently massage the organs in the abdominal area. All of these are good to help you wake up and go into the rest of your day.
Muscles worked: This moves your spine, releasing tension in it, and your arm, abdominal, and back muscles.
Cat-Cow

  1. Push up from Child’s Pose onto all fours, the top of your feet flat, shoulders directly over your wrists, and hips directly over your knees.
  2. As you inhale, drop your belly, letting your back arch but keeping your shoulders rolled back and down (this is Cow). Look slightly upward toward the ceiling.
  3. As you exhale, press into your hands into the ground and round your upper back (This is Cat).
  4. Continue moving, arching on your inhales and rounding on your exhales, repeating this for 5 breaths.

Downward-Facing Dog (Adho Mukha Svanasana)

This pose is great for the morning because it’s a mild inversion. It resets your nervous system, calms the brain, and energizes the body.
It can also be therapeutic for sciatica and relieve fatigue. If you have back problems that impact your sleep and leave you achy and tired, this pose is especially for you. Consider doing it for twice as long as suggested below or returning to it between other poses in this sequence for three breaths each time.
Muscles worked: This pose actively works your arms, shoulders, wrists, and core, while it stretches your hamstrings, spine, and calves. A lot of your body is either working or stretching here.
Downward Dog Stretch
  1. From all fours, push into your hands, straightening your arms as you raise your hips and straighten your legs. Note: You may want to inch your feet and hands a little farther apart, as a longer stance is normally more comfortable and beneficial. Your heels don’t have to be touching the ground here and won’t be for most people. “Working toward the ground” (not being on your tiptoes) is fine.
  2. As you exhale, press into your hands and roll your shoulders down and back, moving your shoulder blades down your back and your shoulders away from your ears.
  3. Your spine should be neutral here. You don’t want your upper spine working too hard, your shoulders hunched, or your belly dropping too far toward the floor in a swayback.
  4. Take at least 5 deep breaths here, bending one knee and then the other as you do, to gently open up the back of each legs. Settle into the pose by not moving your legs for at least 2 deep breaths.

One-Legged Dog (Eka Pada Adho Mukha Svanasana)

This pose opens up your side body and your hips, and quiets the mind while developing confidence. It’s not a bad addition to a morning practice.
Muscles worked: This pose stretches the side body, hamstrings, and hip flexors while strengthening your arms.
One-Legged Dog
  1. In Downward Dog, be sure you are grounding fully and evenly pressing into both hands, and take a deep inhale, lifting your right leg as you do.
  2. When your leg is as high as you can comfortably get it while keeping your hips level with the ground, exhale and let your right leg bend, with your heel moving toward your butt, and then turn so that you can open the right side of your body.
  3. Take two deep breaths here, taking the time to let your hip and side open up and lengthen.
  4. Straighten the right leg as you square your hips back toward the mat, and gently return it to the ground as you exhale. Switch sides.

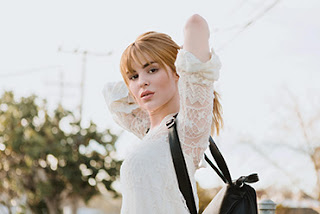
Warrior I (Virabhadrasana I)

This standing pose is what is known as a “power pose.” It can increase confidence, flexibility in your hips, focus, and it energizes the whole body.
Muscles worked: Warrior I strengthens your shoulders, back, arms, legs, and ankles. It opens your hips, chests, and lungs, and increases circulation.
Warrior I
  1. Beginning in Downward Dog, lift your right foot half as high as in Three-Legged Dog and bend your knee in toward your nose.
  2. Plant your right foot between your hands or, if needed, behind your right hand. (If you can’t get your foot as close to your hand as you’d like, simply set it down, grab your ankle with one hand, and help move it forward. Or you can rise to standing and inch it forward.)
  3. Once your right foot is planted, rise to standing as you inhale deeply. Right now, both feet should still be toes pointing toward the top of your mat.
  4. If your foot didn’t go as far forward as you’d like for this pose, inch it forward now. When your stance feels stable, pivot your heel all the way to the ground, so your back foot is flat on the ground and at about a 45-degree angle. Your heels should align if you were to draw a line from one to the other.
  5. Your back leg is straight and your front leg bent, knee over ankle. As you sink your hips a little bit more, deepen the stretch, inhale and lift your arms over your head, palms facing each other but still parallel, at shoulder width. Take 3 deep breaths.
  6. When you’re ready, you can go back into Downward-Facing Dog to switch legs. Or you can lift your left heel up, making your feet parallel again, then step forward with your left, take a deep breath and as you exhale, step your right foot back to be the back foot.

Mountain Pose (Tadasana)

This pose always seems simple, but it can do a lot for your posture, your confidence, and the rest of your yoga practice if you do it right.
Muscles worked: Mountain pose works an assortment of muscles in your torso, legs, core, and arms. Even the arches of your feet should be engaged here.
Mountain Pose
  1. You can simply step your right foot forward from the previous pose or you can, from Downward-Facing Dog, look between your hands and step one foot, then the other up to meet at the top of your mat, and rise to standing.
  2. Your feet should either have your big toes just barely touching, your heels will be a little bit apart, or you can have your feet a few inches apart to improve your balance.
  3. Relax your arms so they are resting at your sides but are still active. Your shoulder blades will be rolled down and onto your back, your neck elongated, and your palms facing forward to keep them engaged.
  4. As you inhale and exhale here, shift your weight just the tiniest bit back and forth in your feet, to see if you really are standing equally into both sides. Consider lifting just your toes up and spreading them out, or maybe even seeing if you can get all 4 corners of your feet to take your weight equally.
  5. Take 5 deep breaths here.

Standing Forward Bend (Uttanasana)

This pose calms the brain, relieves stress, fatigue, and anxiety, and stimulates the kidneys, liver, and digestion. It also feels kind of like you’re giving yourself a hug, which is never a bad thing.
Muscles worked: Uttanasana works your spinal muscles, your glutes, hamstrings, quadriceps, and piriformis.
Stand and Reach Stretch
  1. From Mountain pose, take a deep breath in, lifting your hands up and out, until they meet above your head.
  2. As you exhale that breath, fold at your hip joints (not your waist), keeping your torso long and lifted as you do.
  3. Your legs will remain straight, so you will place your hands wherever is most comfortable for you: on your shins, ankles, feet, or even the floor. You can also bring your palms to the backs of your calves or ankles. (Note: If none of those options feel OK for your body, hold opposite elbows.)
  4. Keep your feet planted firmly and your hips over your heels. As you stay here for 5 deep, even breaths, remember to elongate your core and spine on your inhalations. Release into your bend with your exhalations. Fully relax your head and neck.
  5. When you have completed five full breaths here, release your arms from wherever they were as you exhale, and rise back up, lifting from your hip joints and core, as you inhale.
  6. Return to Mountain pose for 5 breaths to end the practice.

The takeaway

Everyone has their own morning routine: meditation, coffee, hot water with lemon, breakfast and a workout, etc.
By incorporating a quick yoga routine into yours, you can turn inward before you start your day. You’ll give yourself a little “me time” before putting it all out there. Plus, you’ll stimulate your organs, your brain, your muscles, and your focus.
You can also wait on your coffee until a more appropriate time. Studies say it’s more effective between 10 a.m. and noon, anyway!

8 surprising ways to naturally heal and revive skin. Did you know about #7?

8 surprising ways to naturally heal and revive skin. Did you know about #7?


Every teenager has it. Some of us (okay, most of us) still suffer from it.
We're talking about acne.
When the acne finally clears, we're often left with acne scars. The cycle can feel exhausting and endless
Luckily, there are a number of home remedies that can heal acne scars and make you want to touch and look at your skin all day long.
1. Egg whites. Eggs are packed with proteins and amino acids that can actually tighten pores, preventing new breakouts, while lightening old scars. To use this home remedy, Heal Dove recommends whipping egg whites from 3 eggs until they are fluffy and white. Gently spread the egg white onto your skin using your fingers or a cotton ball. Take time to rub the egg white into problem areas. Let the egg white dry and then rinse with warm water. Repeat this home remedy 2 to 3 times weekly for best results.
2. Tomato. Everyone's heard of placing cucumber slices over your eyes, but tomato slices on your face? According to the WordPress site, "Get Rid of Acne Scars," sitting with tomatoes on the face for just 15 minutes can reduce the appearance of acne scars. This is because tomatoes contain lycopene and malice acid, both of which help the body create new skin cells.
3. Honey. Honey is one of the healthiest products available. It is naturally anti-viral, anti-bacterial, and anti-fungal. When applied topically, it can effectively remove acne-causing microbes, says Organic Facts. It is also regenerative and can make your skin nice and smooth. Simply rub a layer of honey into the skin and relax as it does its magic. You can experiment by adding cinnamon, yogurt, turmeric, lavender essential oil or tea tree oil to see which combination works best for your skin.
4. Olive oil. Vitamin-rich olive oil is a powerhouse against aging. Olive oil does not clog pores and has anti-oxidant and anti-inflammatory properties that can prevent and treat acne scaring. Incorporate olive oil into your daily skin routine by using it to remove makeup, or follow the advice of Heal Dove and give yourself an olive oil face steam. To do this, gently massage olive oil into the skin, concentrating on problem areas. Once the pores are saturated, drape a warm washcloth over the face. Relax until the washcloth is no longer warm. Remove it and gently wipe away the excess water. You can repeat this process one more time before rinsing the face with cold water.
5. Lemon. The citric, lactic, and glycol acids in lemon juice are known to increase collagen production, says Heal Dove. More collagen in the skin means less visible acne scars. Lemon has the double benefit of being a natural disinfectant against acne-causing bacteria. To use this home remedy, wash the face with a mild soap. Squeeze the juice from 1 to 3 lemons into a bowl and then using a cotton ball, lightly dab the juice onto the scars 2 to 3 times weekly.
6. Aloe vera. The soothing gel of aloe vera is a natural boost to the immune system, which is necessary for regenerating acne scar tissue, reports Heal Dove. Rubbing the gel from an aloe vera plant (you can grow one at home!) into your face just once a week can heal scars and prevent future breakouts.
7. Mint. Crushing anti-oxidant-rich mint leaves and applying the extracted juice to acne scars can tone the skin and help heal scars, saysLetHow.
8. Potato. This less likely home remedy is effective because potatoes have wondrous antibacterial properties and also works to remove dead skin cells, explains LetHow. Using this home remedy can reveal a not-yet seen layer of beautiful, healthy skin. To use this home remedy, simply rub a raw potato slice into acne scars.
Which home remedies have helped you heal acne? Tell us and SHAREthis article on social media!

Easy home remedies for sunburns

Easy home remedies for sunburns


The spring and summer seasons bring lots of sunshine, which means more time outdoors, and more sunburns. While wearing sunscreen to prevent sunburn should be your first choice, it's easy to forget to apply or reapply it when you're having fun. If sunscreen slipped your mind and now you're left with a painful burn, you don't have to live in misery for days. 
Check out a few of these simple, natural remedies for a sunburn:
Potato Pulp
Head to the kitchen and grab a potato. Grate the potato and squeeze the grated potato to remove the juices. Set the juice aside. Grind the potato to a paste and apply it to your skin. After a few minutes, wash the potato off and massage the potato juice into your skin. Do this once or twice a day until the sunburn disappears, according to Search Home Remedy
Cornstarch/baking soda paste
Try this natural remedy recommended by Everyday Roots. Combine your cornstarch or baking soda with water until you get a paste. Apply this all over your burned area and leave it on until the pain has subsided. Rinse 
Tea
Relieve some of redness and pain from your sunburn with green tea and mint. Cook the tea per usual, adding fresh mint leaves to the water as the tea soaks. Cover and let set for at least an hour. Strain, chill and apply the tea to your skin using cotton pads, Everyday Roots suggests. 
Vinegar
Applying apple cider vinegar is another simple way to relieve the pain of a sunburn. Fill a spray bottle with the vinegar and spritz burned area. You can also apply with cotton swabs, according to Everyday Roots. 
Witch Hazel
Everyday Roots recommends applying witch hazel to burned areas using a soft cloth. Witch hazel contains tannis, which heals damaged skin and can reduce swelling.
Mint and Lavender Oil
Oil may sound like the last thing you want to add to a sunburn, but these natural oils can help relieve pain and ease the heat caused by sunburn, according to Healthy Treasures.  Mix peppermint and lavender oil with some water in a spray bottle. Apply the mixture to the burned area as needed and gently massage into the skin. This method can also help reduce peeling if applied as quickly as possible after you get the sunburn. 
As an added benefit, this remedy can be applied anywhere, even on the go, and doesn't leave you smelling like vinegar all day long
These photos show the difference between day one and day three of a sunburn. Rachel applied lavender and peppermint to her skin after her sunburn. The burn was completely gone in three days with little to no peeling, according to Healthy Treasures. 
Next time your forget to apply sunscreen, try one of these natural remedies to ease the burn. Like these ideas? Share them with your friends on Facebook. Tell us how you deal with sunburn pain in the comments below

What you need to know about mosquitoes and keeping them away this summer


What you need to know about mosquitoes and keeping them away this summer


Summer is amazing. More daylight, warm nights, campfires, picnics ... mosquitoes. Okay, maybe not mosquitoes.  According to Lawrence Journal World, mosquitoes ranks at the top of the list for most annoying bugs. The stinging bites and itching hives are enough to send the most down-to-earth person over the edge. 
If you are one of the unfortunate souls that seem to attract these blood suckers more often than others, there's a reason why. TheSmithsonian says that mosquitoes are actually more attracted to about 20 percent of the population. 
Things that attract the bugs: blood type (type O being the personal preference of most mosquitoes), lactic acid (sweat, higher body temperatures and genetic factors play into this), certain types of skin bacteria, consumption of alcohol, pregnancy, and the color of your clothing  (skip the red, black, and dark blue). 
You can't mess with genetics, but in addition to skipping the beer, wearing all white and taking a cold shower, you may be able to repel the bugs without taking a bath in a can of bug spray. 

Homemade soak for strong nails

Homemade soak for strong nails


If you have brittle nails that break easily, you may want to try a nail soak. New Zealand-based YouTube star and beauty guru Ela Gale shares her favorite home remedy for strong, long, beautiful nails.
Gale's nail soak requires 1/2 cup freshly squeezed orange juice, 1 clove crushed garlic, and 1/4 cup olive oil.
Simply begin by combining the orange juice and crushed garlic. Soak your nails in the mixture for 15 minutes. Rinse your nails in water and then soak them for 5 minutes in straight extra virgin olive oil.
For the best results, Gale recommends soaking your nails twice a week. She remarks that the nail soak not only makes your nails grow in faster and stronger, but it also makes your skin silky smooth.
Meghan Carlson of Julep says that in addition to nail soaks, you can strengthen your nails by wearing gloves when washing dishes, drinking lots of water, and avoiding alcohol-based hand sanitizers. You can also try a nail strengthening soak made from 1 tablespoon honey, 1/4 cup milk, and 2 beaten egg yolks, as recommended by Natural Nail Care Recipes.
How do you care for your nails? Tell us and SHARE this article on social media!Simply begin by combining the orange juice and crushed garlic. Soak your nails in the mixture for 15 minutes. Rinse your nails in water and then soak them for 5 minutes in straight extra virgin olive oil.
For the best results, Gale recommends soaking your nails twice a week. She remarks that the nail soak not only makes your nails grow in faster and stronger, but it also makes your skin silky smooth.
Meghan Carlson of Julep says that in addition to nail soaks, you can strengthen your nails by wearing gloves when washing dishes, drinking lots of water, and avoiding alcohol-based hand sanitizers. You can also try a nail strengthening soak made from 1 tablespoon honey, 1/4 cup milk, and 2 beaten egg yolks, as recommended by Natural Nail Care Recipes.
How do you care for your nails? Tell us and SHARE this article on social media!

Signs and symptoms of rosacea and how to treat it

Signs and symptoms of rosacea and how to treat it 


Rosacea is a common skin condition that leaves those affected with red bumpy skin, and often feeling uncomfortable. WebMD says the skin condition doesn't just leave your forehead, cheeks, and chin read and covered in little bumps - it can also leave your eyes dry, and sore. Anyone can develop rosacea, but it most commonly occurs in middle aged white women.
Because rosacea leaves little bumps on the skin, it can be mistaken for acne or even an allergic reaction. The Mayo Clinic says the skin condition also comes in flares - so it might appear for weeks, or even months, then disappear altogether. If rosacea is left untreated, the condition can worsen, so it's important to understand the signs and symptoms so you can talk to your doctor and get proper treatment. 
Like many conditions, the root cause of rosacea is unknown. Doctors believe that it is a combination of genetics, and environmental factors that bring on the skin condition. But, the Mayo Clinic says there are some common triggers that can bring out rosacea:
- Hot foods or beverages
- Spicy foods
- Alcohol
- Extreme heat, or extreme cold
- Sunlight
- Stress, anger or embarrassment
- Strenuous exercise
- Hot baths or saunas
- Corticosteroids, such as prednisone
- Drugs that dilate blood vessels, including some blood pressure medications
Symptoms
The Mayo Clinic says the signs and symptoms you need to look out for are:
1. Redness in the face: Rosacea usually causes redness in the middle of the face, usually caused by tiny blood vessels in the nose and cheeks to becoming visible.
2. Small red bumps: The bumps might resemble acne, and even contain pus like pimples. The bumps can also cause your face to feel tender, and warm.
3. Irritated eyes: Irritated, swollen, and red eyes affect about half of rosacea patients. 
4. Swollen looking nose: Somewhat rare, and more common in men, rosacea can cause the nose to look bulbous (a condition known as rhinophyma).
If you experience any of these signs of symptoms, you should see a doctor or a dermatologist for diagnosis, and proper treatment.
Treating rosacea 
Rosacea can't be cured, so WebMD explains that it's about managing symptoms and avoid flares and triggers.
Managing rosacea symptoms:
Breakouts can be managed with antibiotics, or prescription creams
- Blood vessel redness can be treated with lasers
- Dry, sensitive skin should be protected with sunscreen, and moisturizing lotions
- Irritated eyes can be treated with artificial tear drops
- Thickened, bumpy skin can be treated with cosmetic surgery for the most severe cases
Avoiding rosacea triggers:

Apple Cider Vinegar and honey detox

Apple Cider Vinegar and honey detox

Cleanses are some of today's hottest health trends. The well-respected Dr. Oz recommends cleanses for everything from detoxifying the skin (no dairy, no carbs) to increasing energy (no caffeine and no carbs for 10 days). But some of the most popular cleanses are intended to detox the colon.
WebMD explains colon cleanses date to ancient Greece, when people used cleanses to rid the body of excess mucus and undigested food. In the 21st century, some still believe colon cleanses treat symptoms of fatigue, head ache, low energy, and weight gain. There is also evidence that the nervous system is effected by the bowls, and therefore, colon cleanses can have positive benefits that include an improved mental outlook and stronger immune system.

Kerby Mellon of the blog Healthy Body 23 recommends drinking a homemade solution every single morning to cleanse your colon and start your day balanced and afresh.
Mellon, whose philosophy is to live life with a "healthy attitude," demonstrates in a YouTube video how to make a daily colon cleanse that will "help with everything to get your day started."
Start by brewing 8 ounces of water in a tea kettle or microwave. Add 2 tablespoons of raw, unfiltered apple cider vinegar to the warm water. Next, stir in 1 full tablespoon of raw organic honey.
Mellon reminds viewers to look for the USDA label on the honey jar. She explains organic honey "looks clumped up, not liquid like the regular honey you find in the store." An article on Organics.org verifies Mellon's assertion, explaining, 'regular' honey is stripped of many of the vitamins, nutrients, and enzymes that make raw honey so good for you. Further, raw honey has properties that make it anti-viral and anti-fungal, while 'regular' honey often contains high fructose corn syrup and is sometimes treated with antibiotics.
Once you have stirred your super healthy raw organic honey into the warm water and apple cider vinegar solution, you are all set. Mellon recommends sipping the drink every morning before breakfast.
"It will completely boost your energy level, really help your digestive system, and really help balance out your body all together," says Mellon.
Do YOU use cleanses? Tell us about your morning routine and SHAREthis article on social media!


The benefits of the Tai Yang acupressure point on your health

The benefits of the Tai Yang acupressure point on your health


No need to reach for the ibuprofen next time you have a headache, dull tooth pain, or eye pain. Instead, you can try working a pressure point on your temple to rid yourself of these annoying pains. This technique has been used by the Chinese for centuries, and can be a very effective holistic way to ease these everyday pains.
Chinese Holistic Health Exercises says you start by rubbing your hands together to warm them up, and then apply a little bit of essential oil to your index and middle fingertips. A calming essential oil like lavender is going to help relax you, and help your fingers rub your temple more smoothly. Place your fingers on your temples - the side of your head about an inch outside your eyes - and rub in a circular motion while you focus on this area.
It's important to note that if you experience severe eye, tooth, or head pain you should seek help from a trained medical physician.

Massage your temples to cure these common ailments:
1. Headache
Headaches can occur from daily stresses, but instead of reaching for the ibuprofen every time, try this simple technique that only requires concentration and a few minutes of your time.
2. Eye redness
Allergies or an existing eye condition may be leaving your eyes red and swollen. Try massaging this pressure temple pressure point to reduce redness in this sensitive area.
3. Eye pain
Pain in the eye can be extremely irritating, and debilitating - but fixing the problem might be as simple as taking 2 minutes to massage your temple

4. Tooth pain
A dull, aching tooth leaves you feeling drained. Before you reach for the numbing cream or an over the counter pain reliever, see if rubbing your temple pressure point helps alleviate some of the pressure and pain

A simple trick to finally fall asleep


A simple trick to finally fall asleep


New York Magazine's "The Science of Us" has a solution for anyone who has trouble falling asleep: simply sleep with one foot outside the blankets.
Can this really work? According to spokesperson for the National Sleep Foundation Natalie Dautovich, the home remedy works because the feet contain special structures that link arteries to veins. When the feet are exposed to cold air, the blood cools and moves through the body, effectively cooling the body's core temperature. This is important because the body's temperature naturally drops when you sleep. Therefore, cooling your body before bedtime sends signals to your mind and body that it's time for bed.
Cool feet are so important for a good night's rest, that one study from 2012 showed that when you are sleep deprived, your feet actually heat up. Prevent sleep deprivation before it happens by following the advice of "The Science of Us" and sleep with one foot outside the blankets.

Pages

Popular Posts